TRANSOM II
With all the old wood and poorly bonded fiberglass mat
removed from the forward side of the transom, the process of building it back
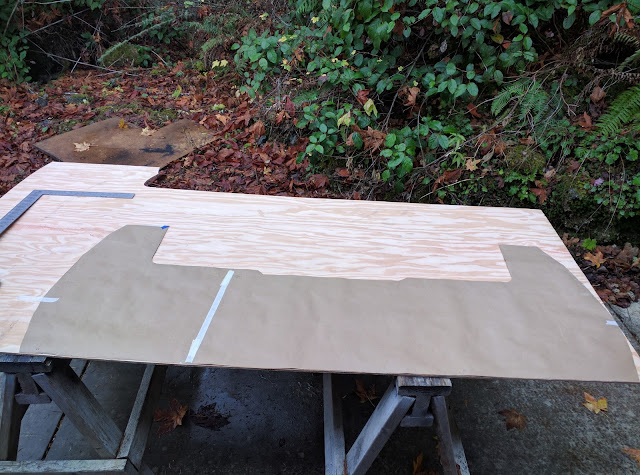
up has begun. Templates were made and used to cut the plywood, starting with a
piece of ¼” A-C. If you are not familiar with plywood grades, “A” refers to a
veneer with no knots (or knots that are patched) and “C” grade has some knots
and voids. So, A-C is knot-free on one side and has some knots and cracks on
the other. It’s my understanding that nearly all plywood these days uses
waterproof glue, but be sure to check (the sign at Lowes said it did).
 |
| Template on ¼” plywood |
The transom needs to be at least 1-⅝" thick to accommodate
most high-horsepower motors. I bought sheets of ¼ and ½” plywood (it's labeled as 15/32); any thicker than
this might be hard to bend to conform to the curvature of the transom. Unless
the deck has been removed, the plywood needs to be cut to get it into the hull.
The joints need to be staggered in successive plys for maximum strength.
After dry-fitting the first ply (including shaping the sides
to conform to the transom) I waterproofed it with epoxy resin. Then, making sure the old fiberglass surfaces were roughed up and cleaned with a solvent, it was time to bond the two surfaces together. For this I again used GelMagic to
get into the nooks and crannies and fill all the gaps, especially important for
the “C” side of the plywood and the not-so-smooth fiberglass of the inner transom. This
is the first time I’ve used this product, and love it. Prior to this I thickened
epoxy with fused silica and other substances, with varying results. Without a
lot of experience it can be difficult to obtain the correct consistency, and the
process of adding small amounts of thickener and then stirring takes a lot of time so your
mix could “flash” (begin to harden) before you are ready to use it. GelMagic is
fairly expensive (a little over $1/oz at Fiberglass Supply), so if you are on a budget you may look for a more affordable
product.
I bonded my first ply on November 11th and the second on the 29th! In between those dates was Thanksgiving and fair amount of rain. There is no extra room under the canopy to coat the wood with resin, so that must be done outside. The next few days promise to be clear, so I hope to get the last two plys in place this week.
 |
| First ply bonding to transom. Note that I've clamped the center portion of the transom with 2" thick lumber so it is planer. This should make the engine easier to mount |
Once in place I used sticks so that full contact with the transom is assured.
The Skagit’s curved transom makes things a little more complicated than other
boats. The second ply required some bolts through the transom to pull it all
the way in, but that was only necessary because it was ½” and it warped in my damp
garage. Wouldn't you know that I cut it on the wrong side so it bent away from the transom.
 |
| Second layer, ½" plywood |


I shall watch in utter fascination .. I hope it gets done and launched early enough so that all the local school kids will get the day off to come watch and celebrate!
ReplyDelete